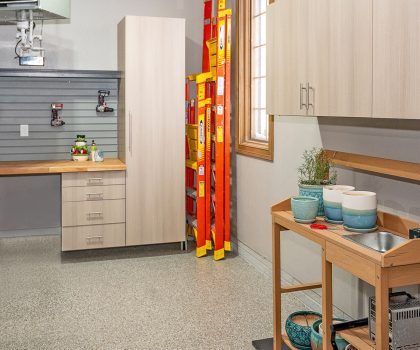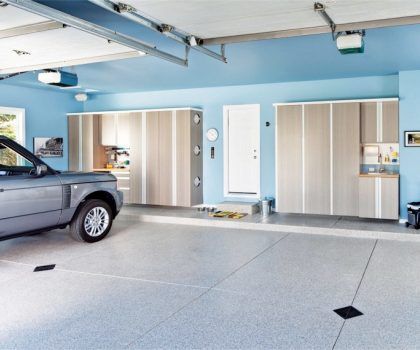
Garage Floor Coating Process - 5 Steps to A Beautiful Garage Floor
Customers who have chosen to upgrade their garage floors with an Encore Flex-Core™ floor coating system are often curious about how our garage floor coating installation process works.
How does Encore Garage Ohio manage to transform their old, damaged, and unattractive garage floor into such an attractive and durable surface? And how are we able to accomplish this in as little as two days?
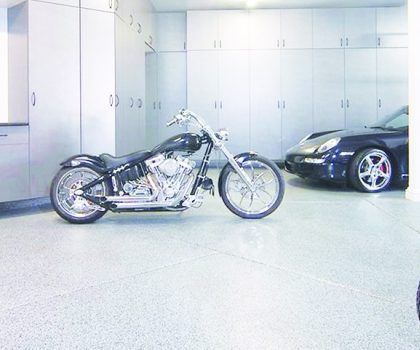
Utilizing the most advanced floor coating materials, state-of-the-art equipment and highly experienced installers, we consistently deliver a high quality, chemical and stain-resistant, easy to clean surface that will remain looking like new for many years to come. Our process ensures a quality installation—guaranteed against peeling or hot-tire pick-up.
5 Step Application Process
Step 1 – DIAMOND GRIND THE SURFACE
Preparation of the concrete prior to applying the base coat layer is critical and essential to the durability and longevity of the epoxy floor coating system. EncoreGarage™ uses mechanical grinders with "diamond studded tooling" for surface preparation – which is far superior to the acid wash method used by others in the industry. We attach HEPA filtered vacuums to our grinders so that the dust and any contaminants are radically reduced. Diamond grinding scours the surface of the concrete to open up the pores as well as eliminate surface contaminants. This installation technique allows the base coat to penetrate deep into the pores of the concrete, creating a superior bond.
Step 2 – REPAIR OF CRACKS, CHIPS & PITTING
Our prep work also includes filling in cracks, patching and fixing any areas that need addressed. Once the filler has cured, the excess is ground down so that the floor is completely smooth and any cracks, chips and pitting are invisible. Floors that require extensive repair work may require up to 24 hours to cure.
Step 3 – HIGH PERFORMANCE EPOXY BASE COAT
The installation process starts by applying a thick layer of industrial grade, 100% solid, deep penetrating epoxy. This epoxy is designed to absorb deep into the pores of the concrete surface. Its slow curing and deep penetrating chemical design promotes much deeper penetration into the concrete pores than any other epoxy or fast curing polyaspartic, thereby creating a superior adhesion. This bond is imperative to a durable, long lasting floor system.
Step 4 – DECORATIVE FLEXCORE™ FLAKES
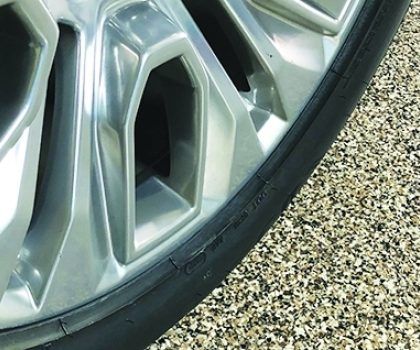
The decorative polymer chips are then broadcasted into the wet epoxy and chemically bond together—which ultimately gives the coating the look of Granite or Terrazzo. The flakes also add body to the epoxy, increasing the overall strength of the system as well as create a texture which increases the overall slip resistance of the system. In order to achieve 100% coverage, we will apply an additional 20-30% more flakes. The following day, we remove the excess flake material using a flat metal edge tool to knock down any standing flakes. Then the entire floor is blown and vacuumed to remove any excess debris. Now the floor is even and smooth, which makes it ready for the final step of the garage floor coating process.
Step 5 – DURABLE POLYASPARTIC TOP COAT
The last step of the process is the application of a high quality, UV stable, scratch, chemical and stain resistant polyaspartic top coat. The top coat is applied by a squeegee and then back rolled. This process ensures that the top coat has a thick and even layer, which leaves a consistent finish that’s extremely durable. The top coat requires 24 hours to cure for foot traffic and 48 hours for vehicles. Once completed, you will have an attractive, high quality and extremely durable floor that reflects the beauty of your home’s interior.
Watch our video on our floor coating application process top see how it’s done.